
Do you remember these awesome quatrefoil lanterns from the Ballard Designs catalog?

I love them. I want them. I can not afford them.
So I made my own.
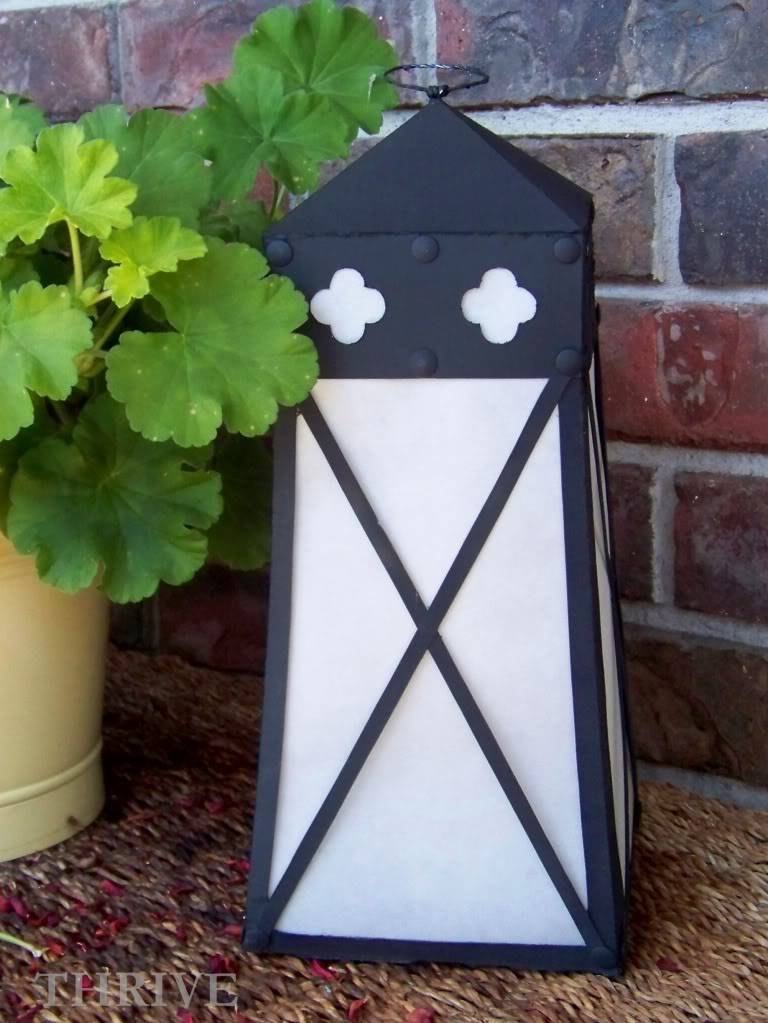
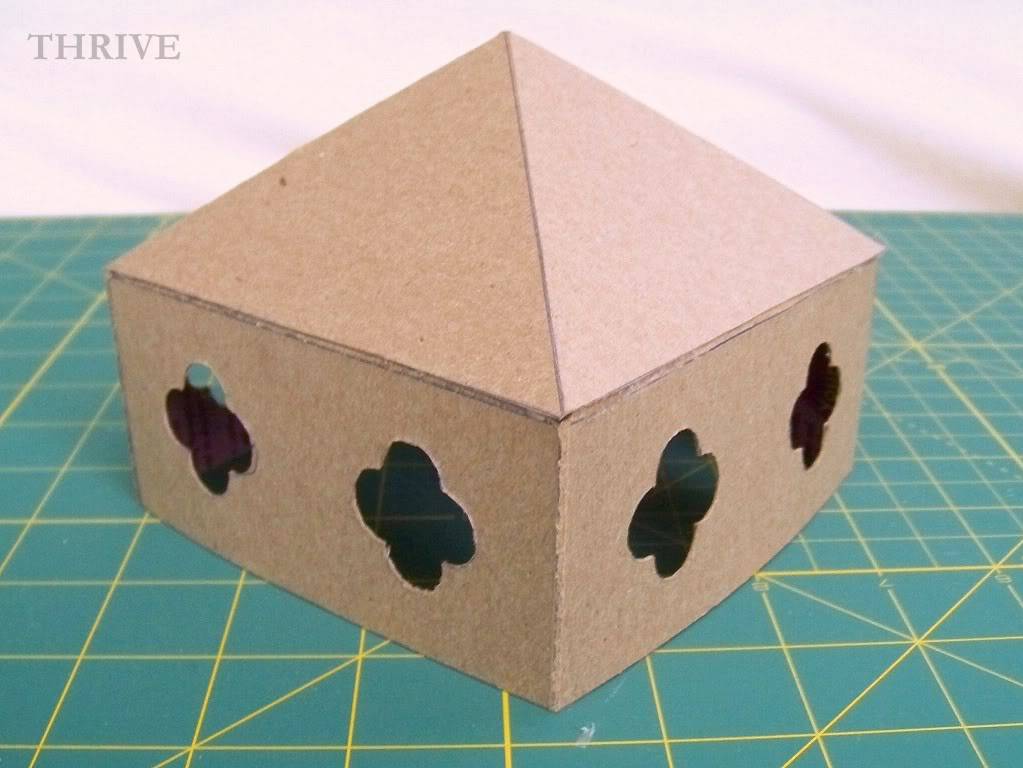
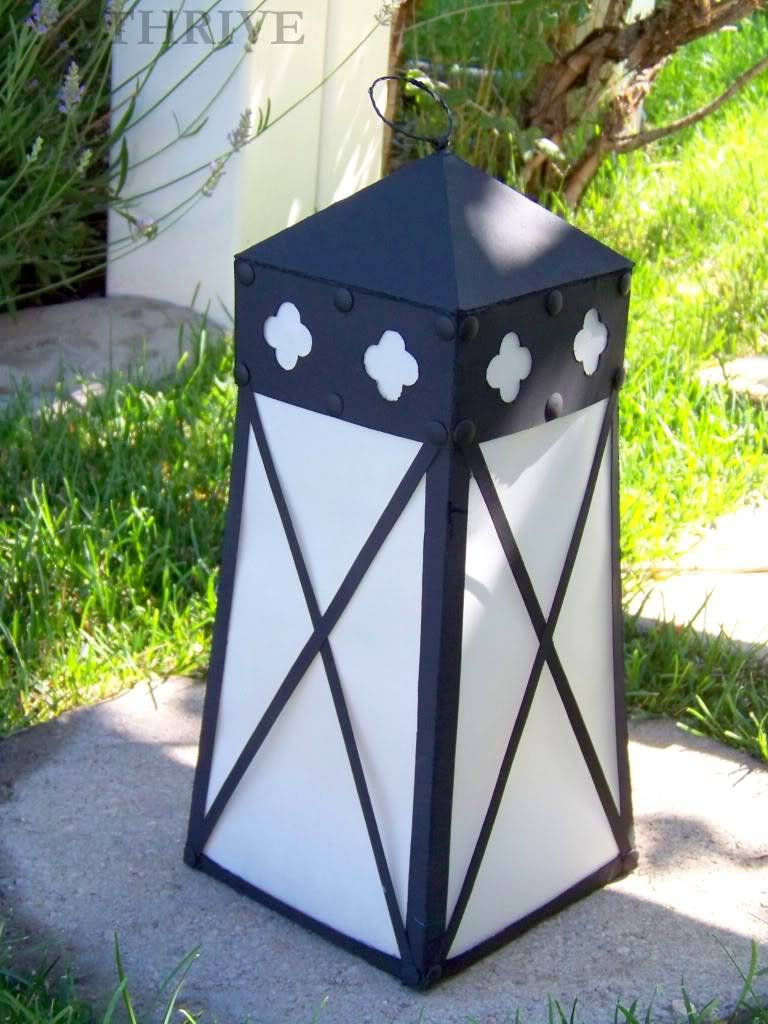
Ta-da!
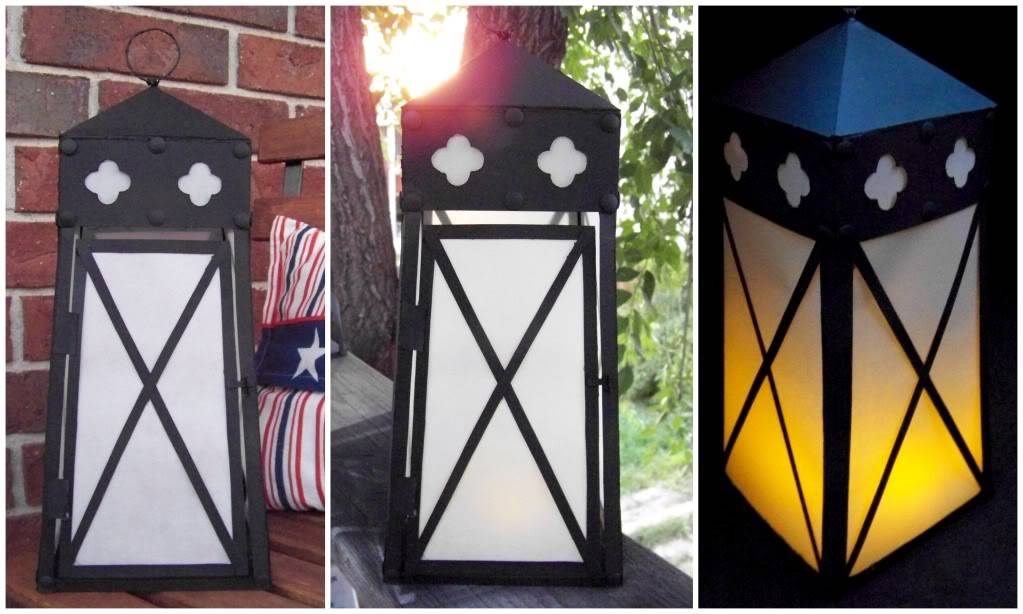
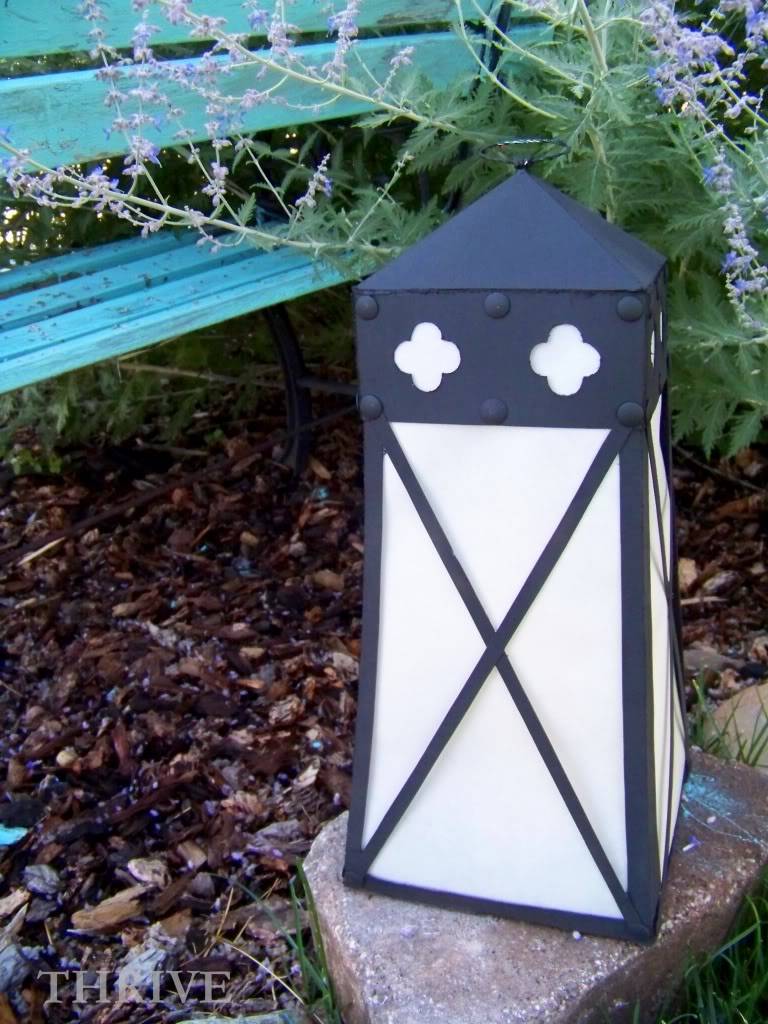
Catalog-inspired quatrefoil lanterns straight from the cereal isle that look good day, dusk and night!
Really.
Want to make your own?
For each lantern you’ll need:
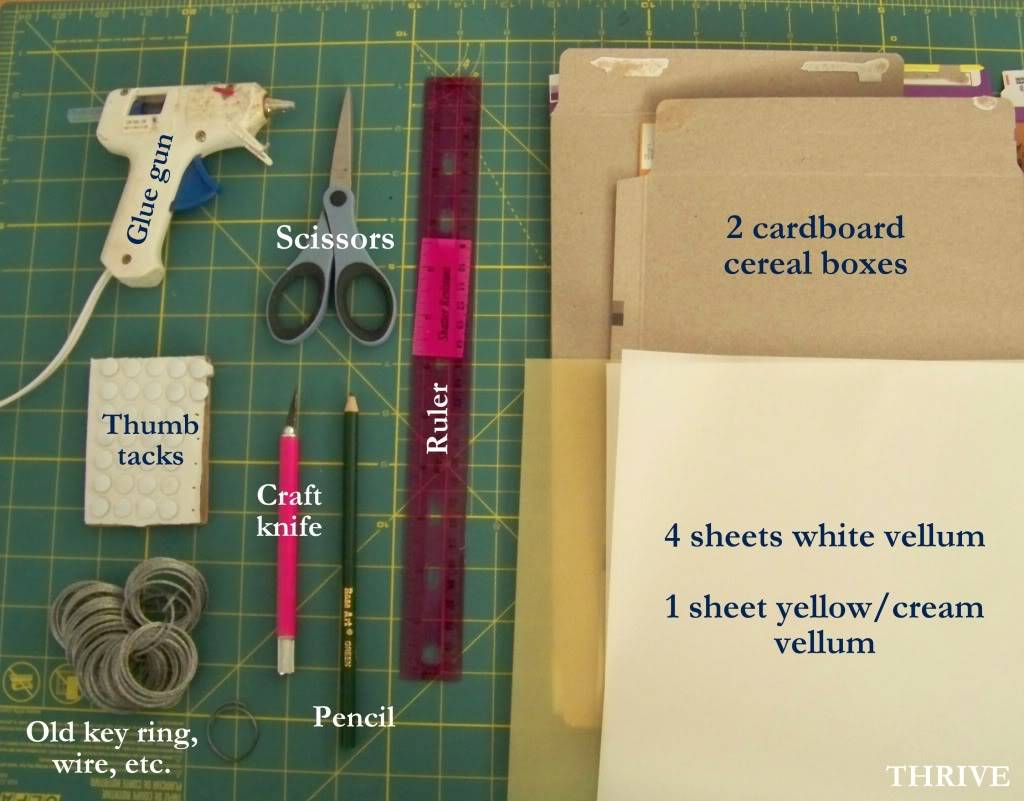
As always I hope you’ll Rock-What-Ya-Got and adapt this project using items around your house to make this without a trip to the store.
And to make life easier, you can even download the pattern pieces I created HERE.
So do that first. (I’ll wait.)
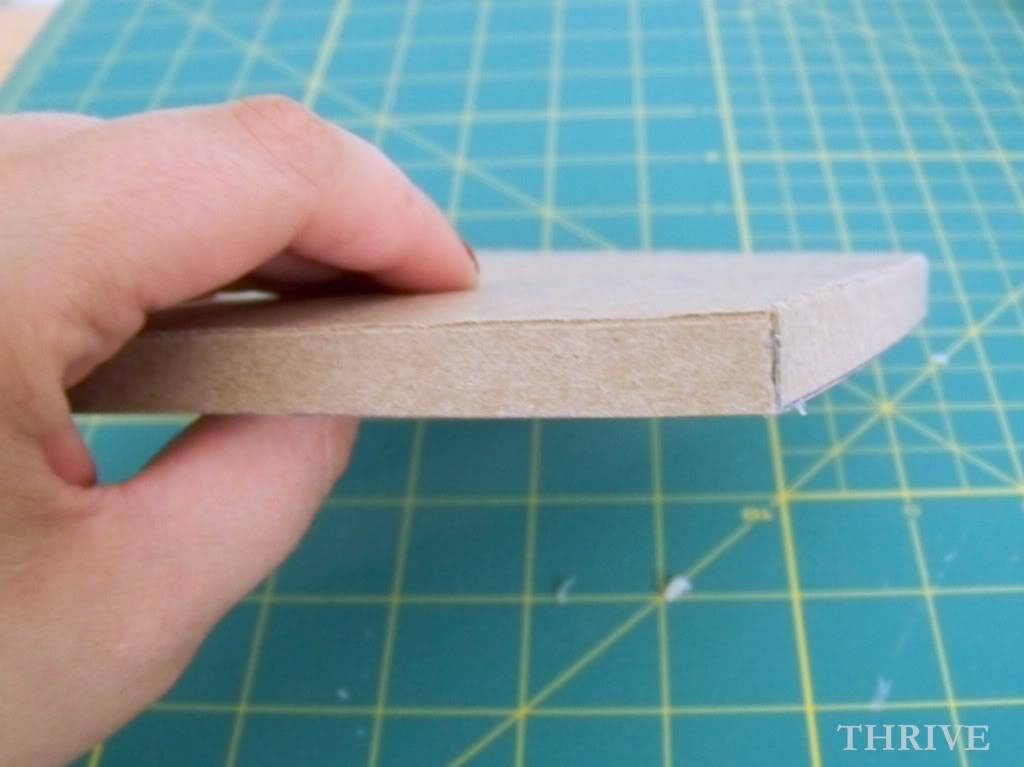
Trace, cut out and score all the lantern pieces according to the pattern instructions.
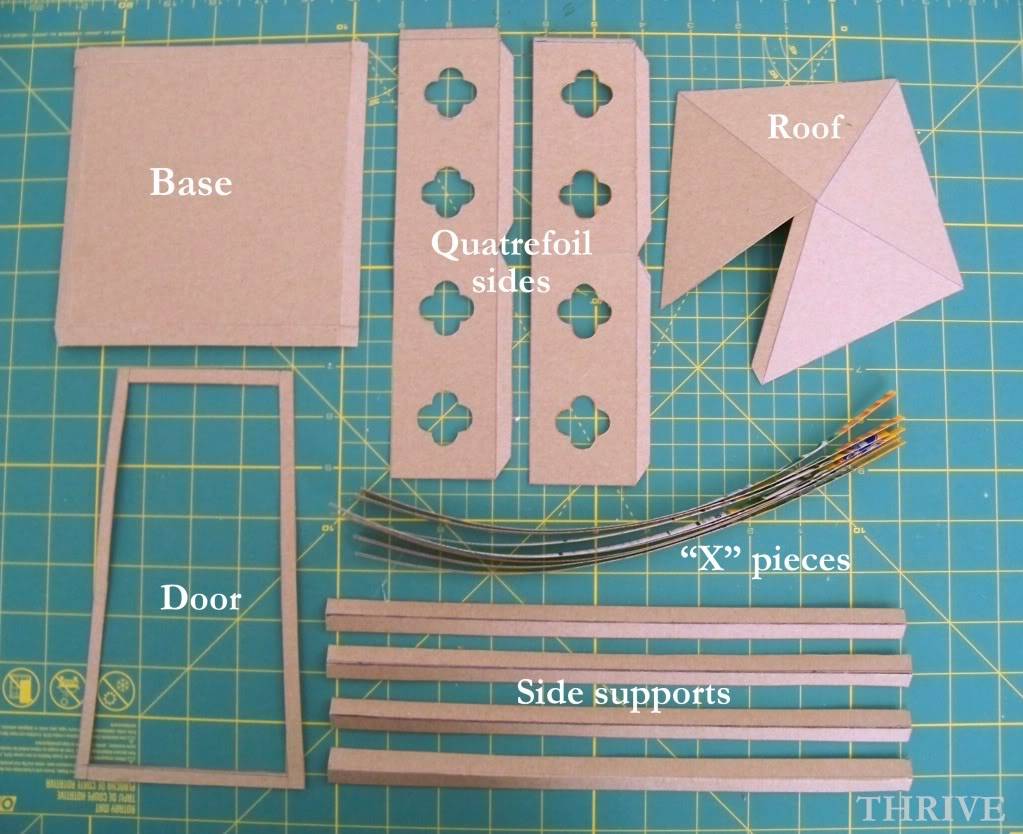
Glue the three main pieces together with hot glue:
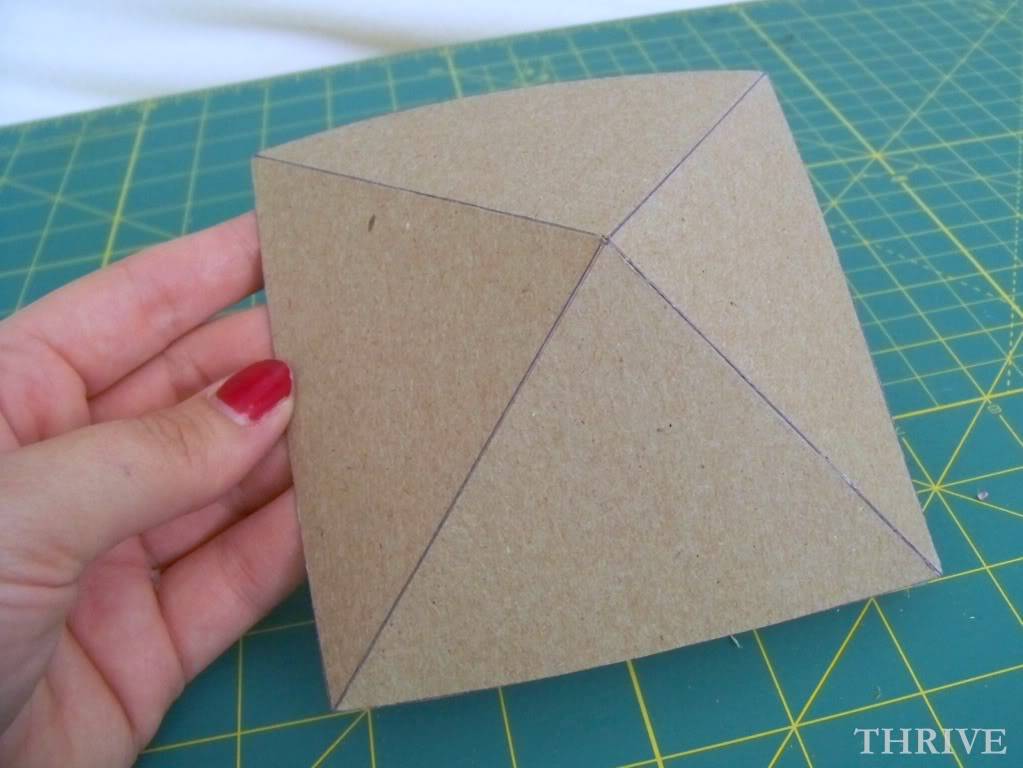
… roof …
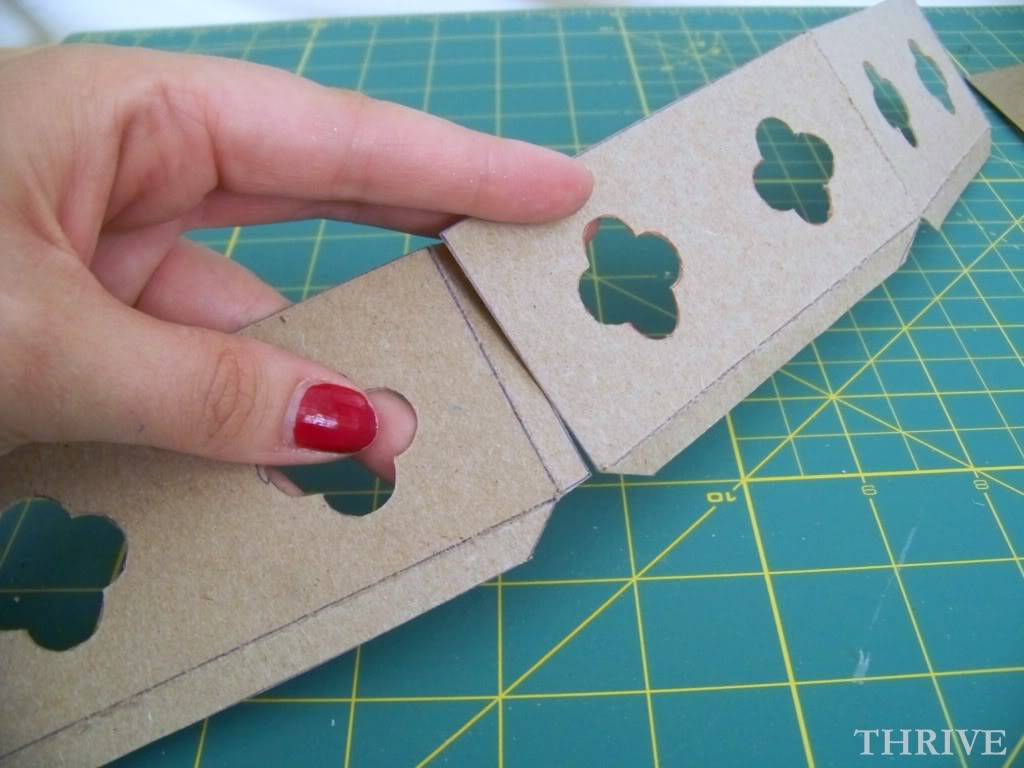
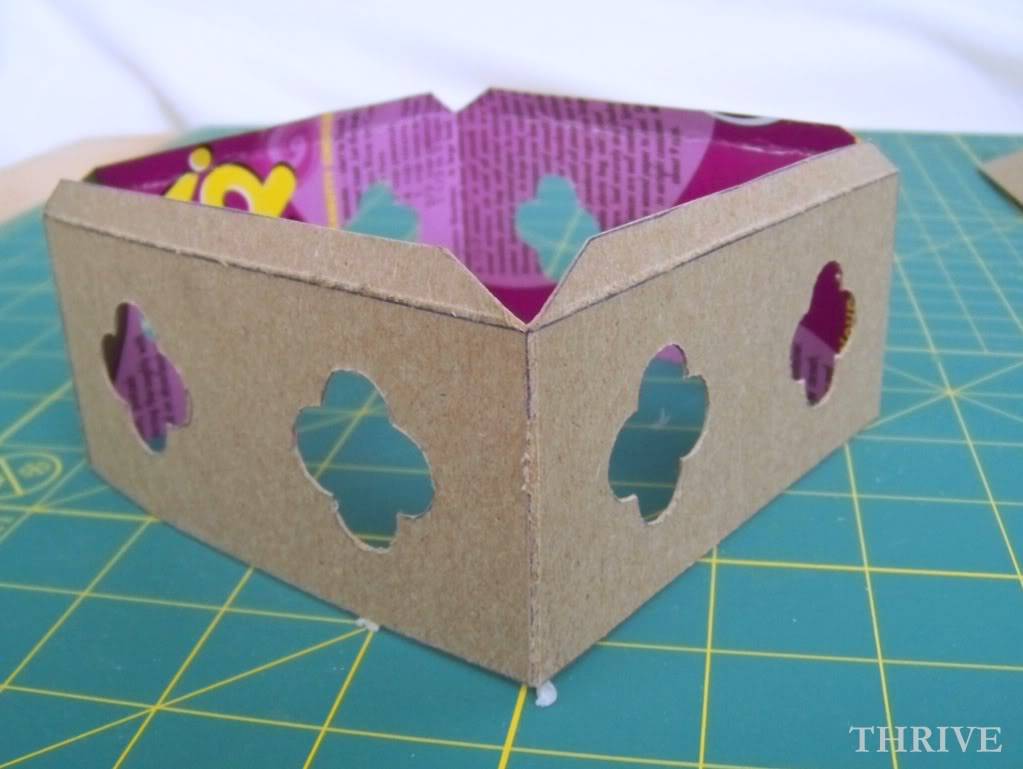
… quatrefoil side pieces …
… and base.
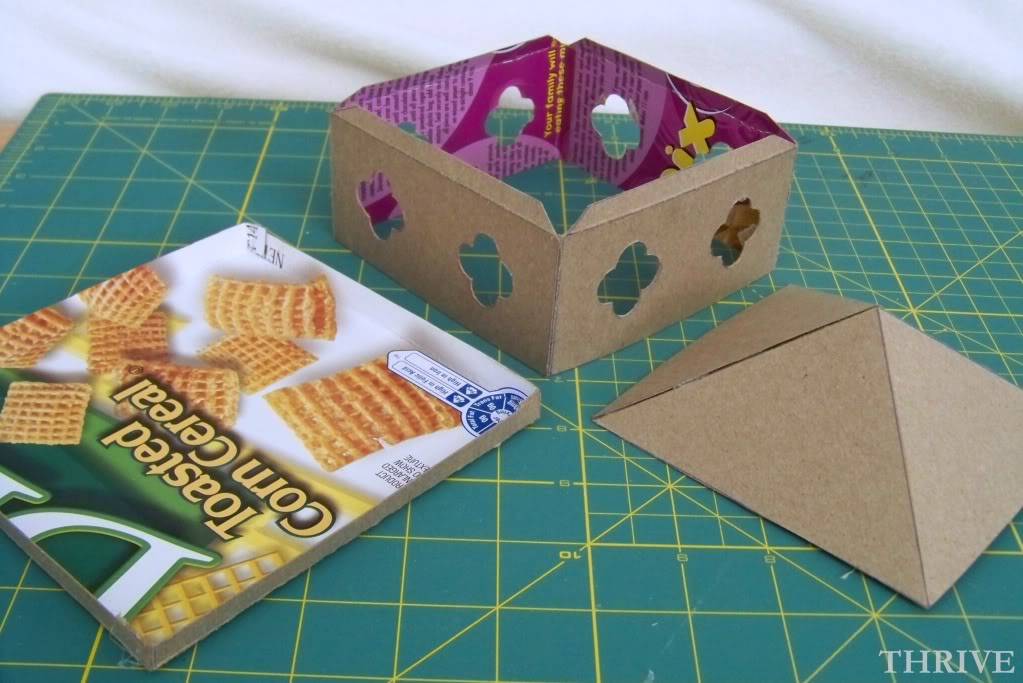
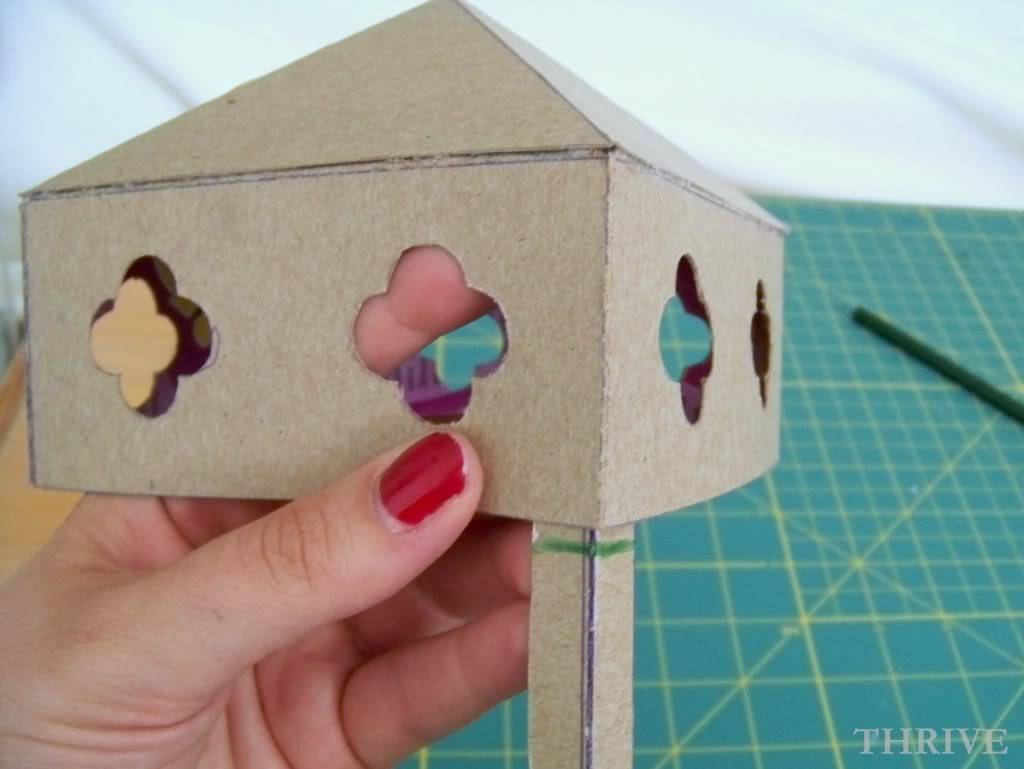
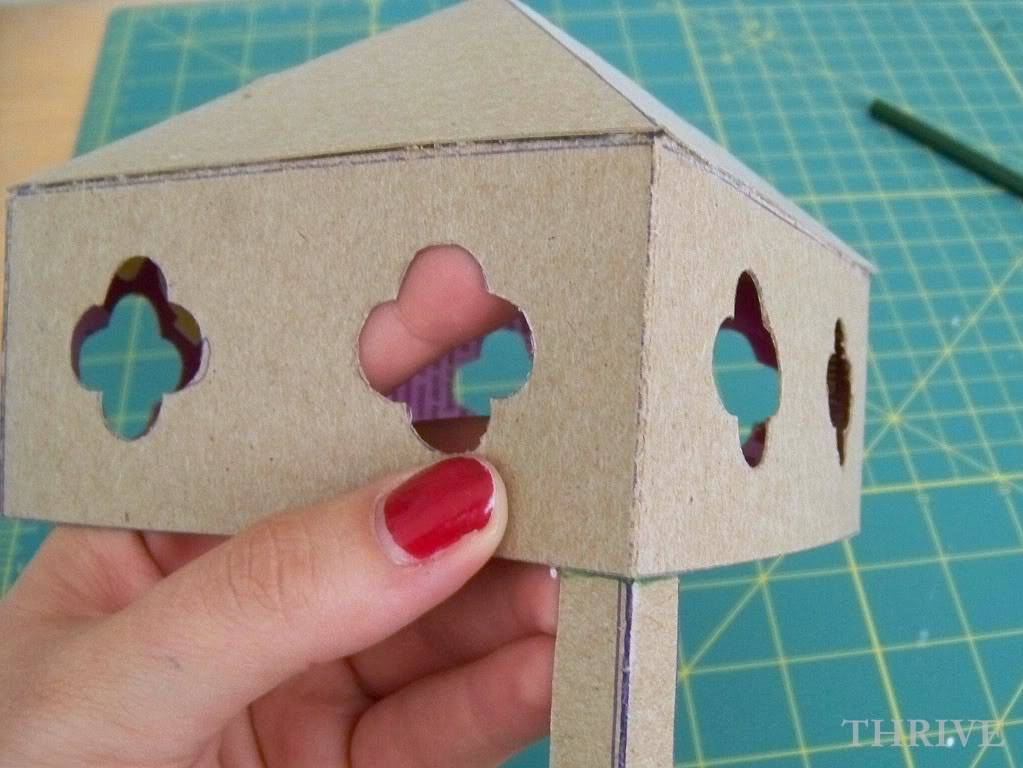
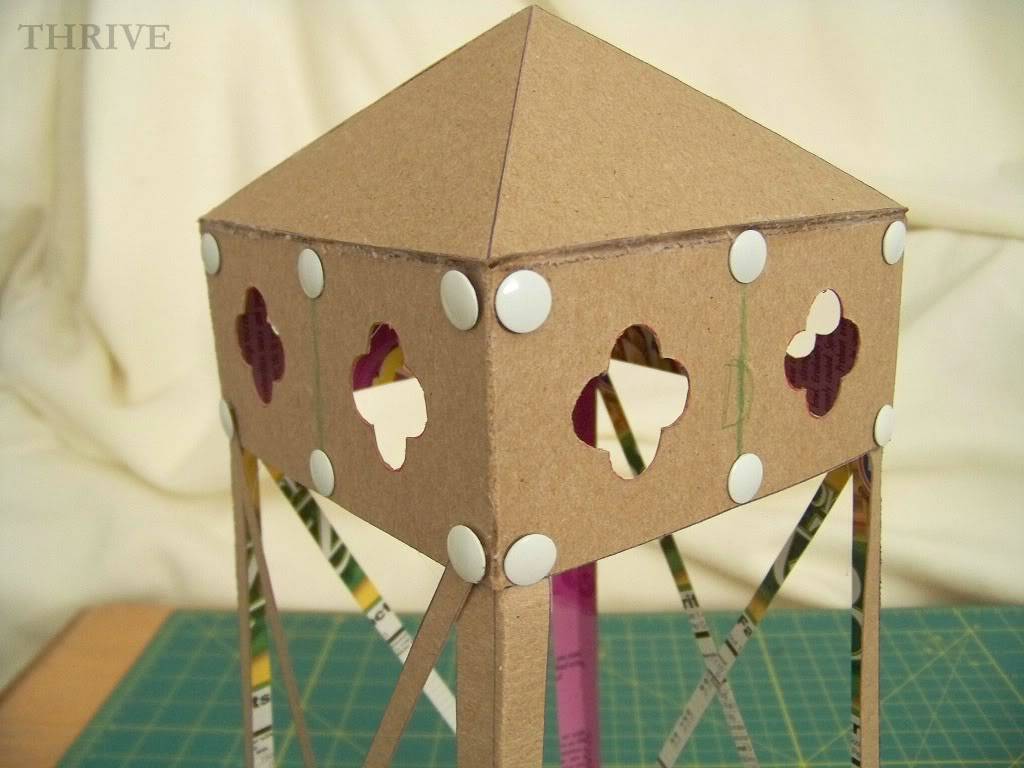
Attach the roof and quatrefoil pieces together with hot glue.
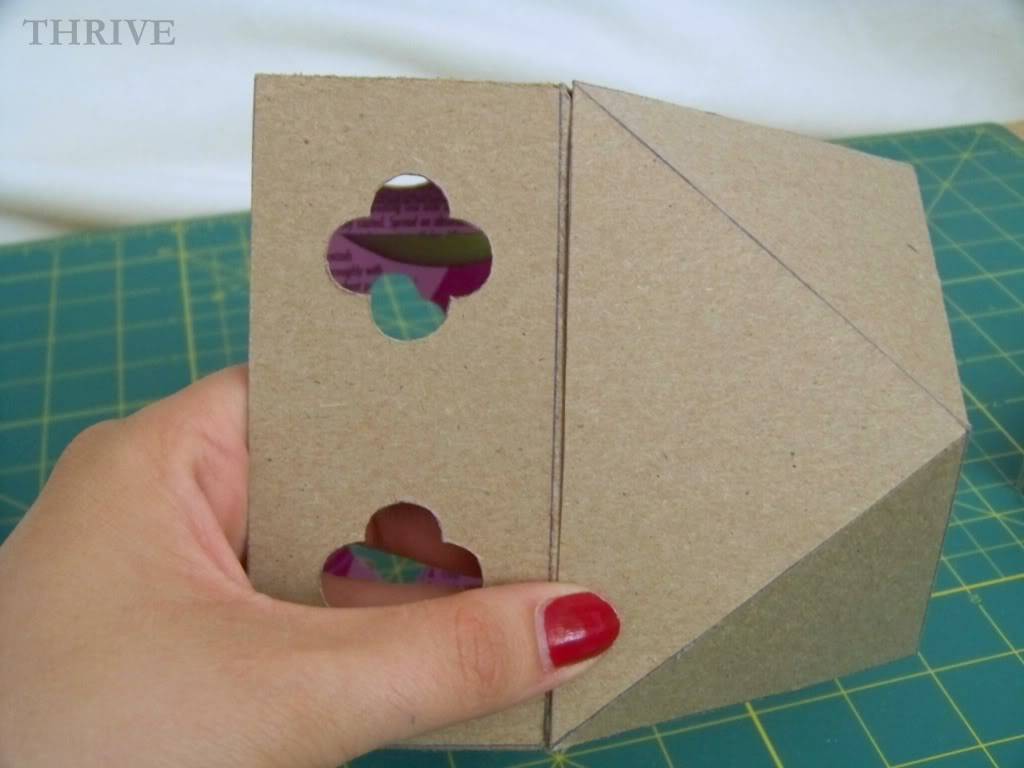
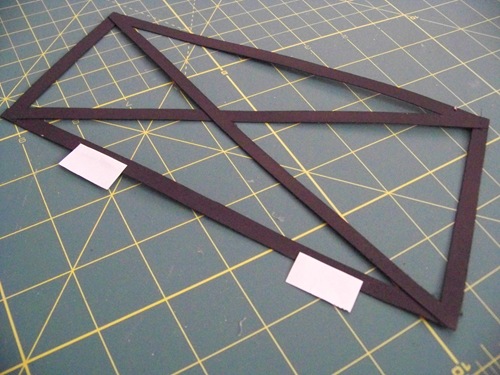
Mark a line 1/4” down on each side support pieces …
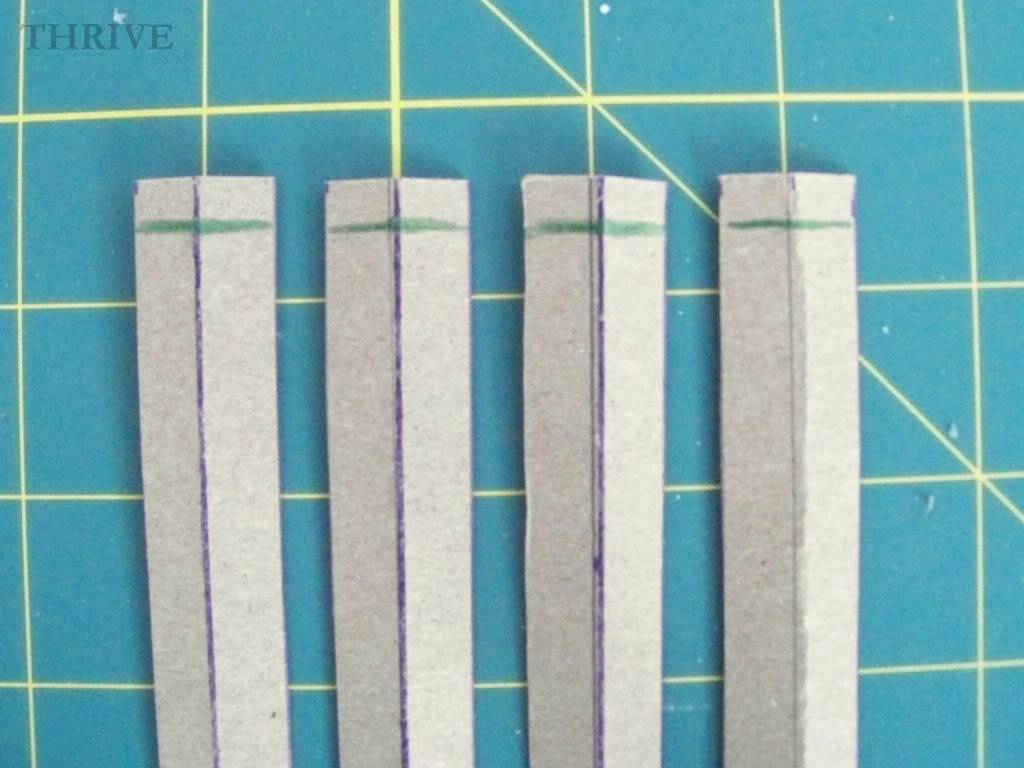
… and glue just the top 1/4” of each side support to the inside corners of the quatrefoil /roof piece.
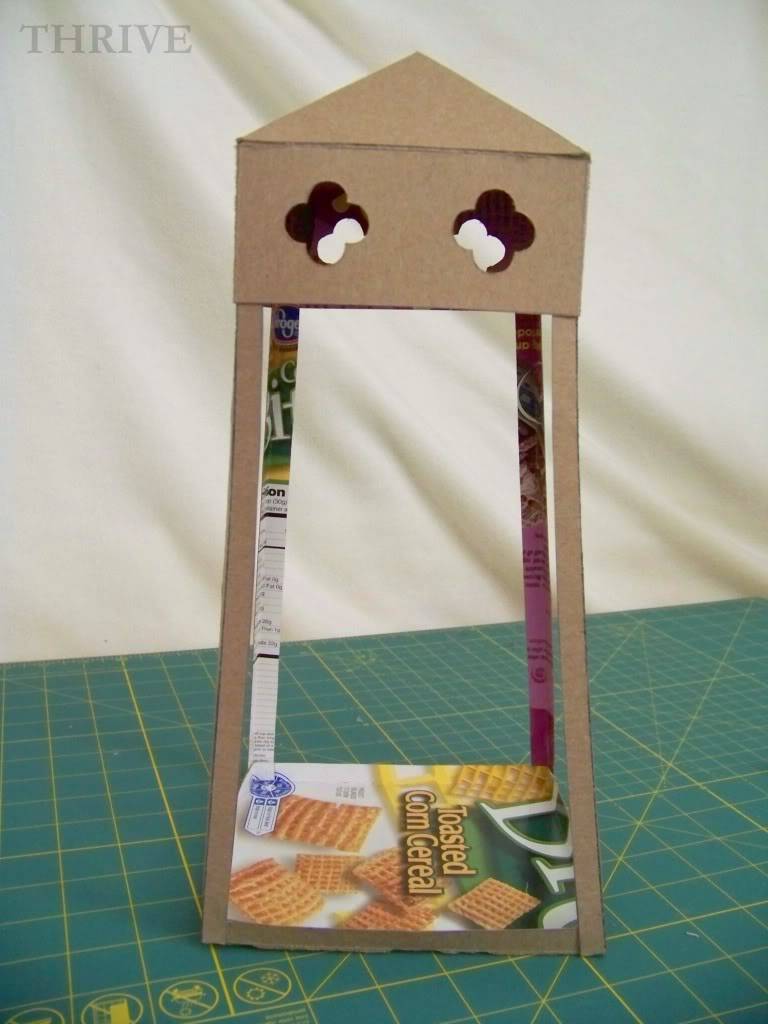
Glue side support pieces to the outside corners of the base.
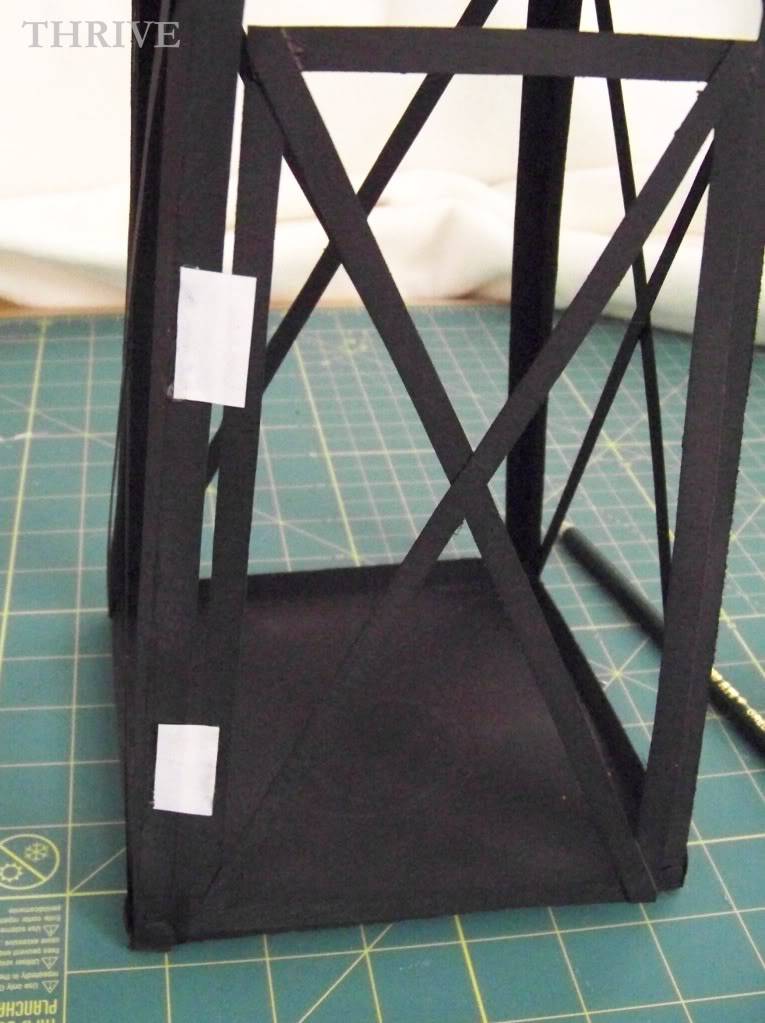
To make the “X” pieces on each side of the lantern, attach the long 1/4” strips with thumb tacks and trim away excess.
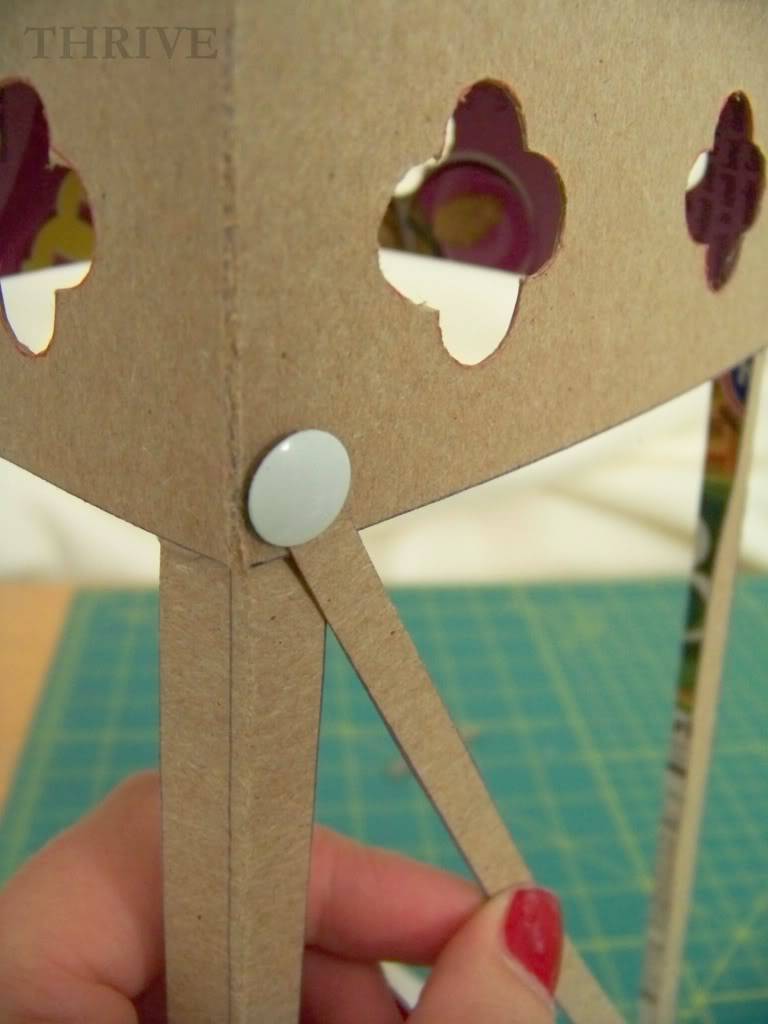
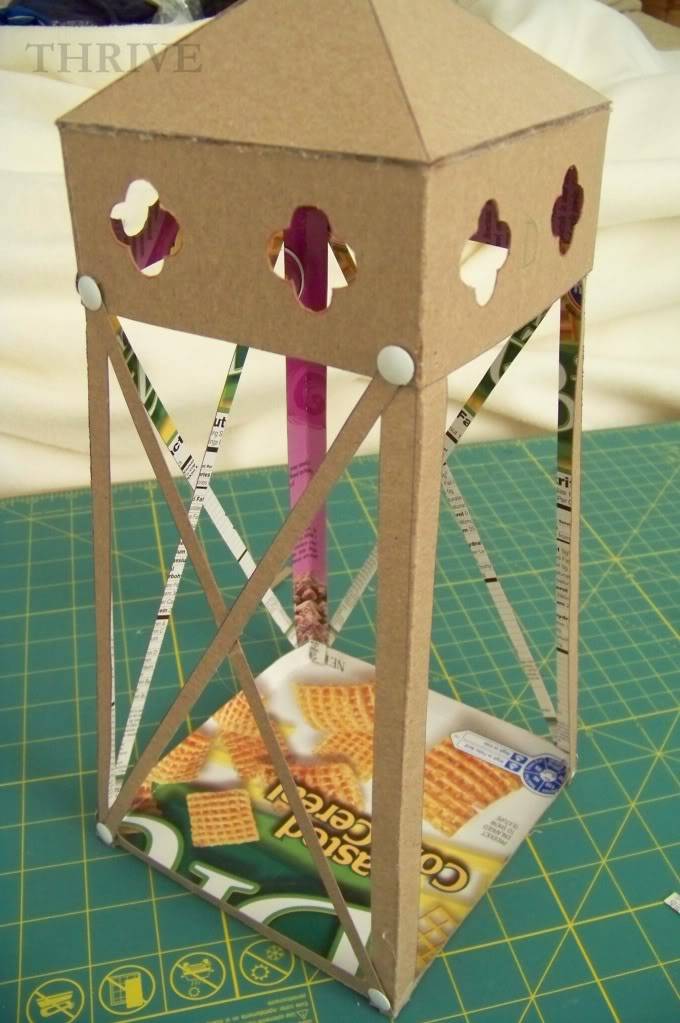
Carefully push through remaining thumb tacks around the quatrefoil piece.
To attach the hanging loop to the roof, make a quick loop out of wire or even left over holiday garland from the dollar store like I did.
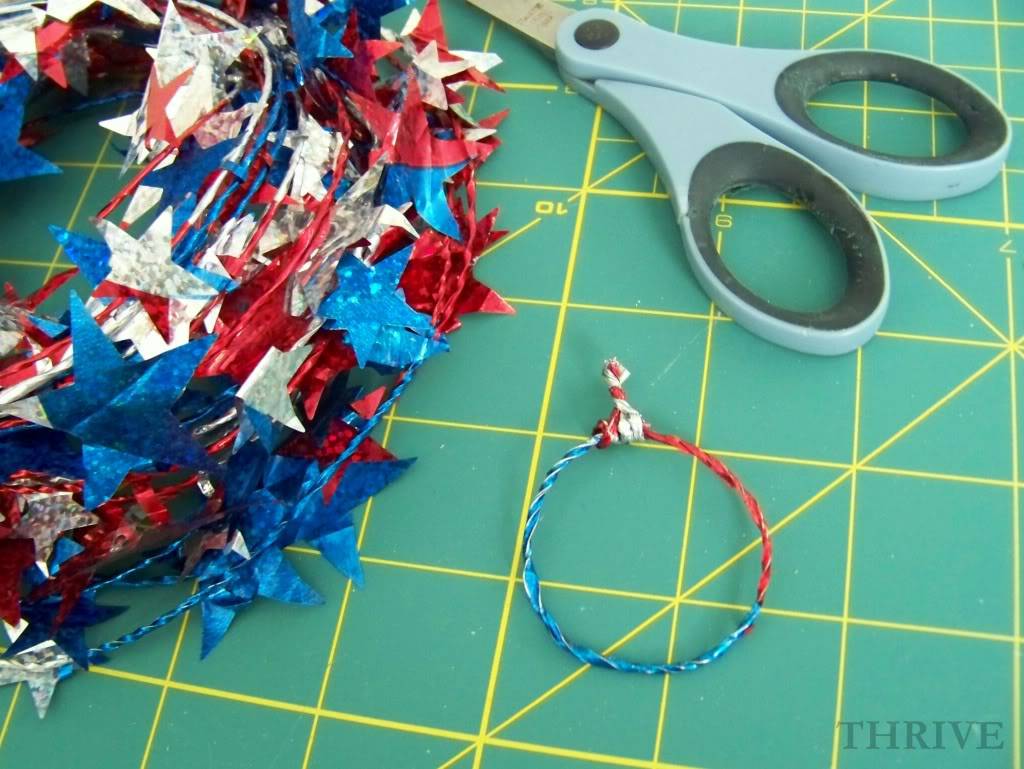
Make a hole in the roof with a craft knife and hot glue the loop in place.
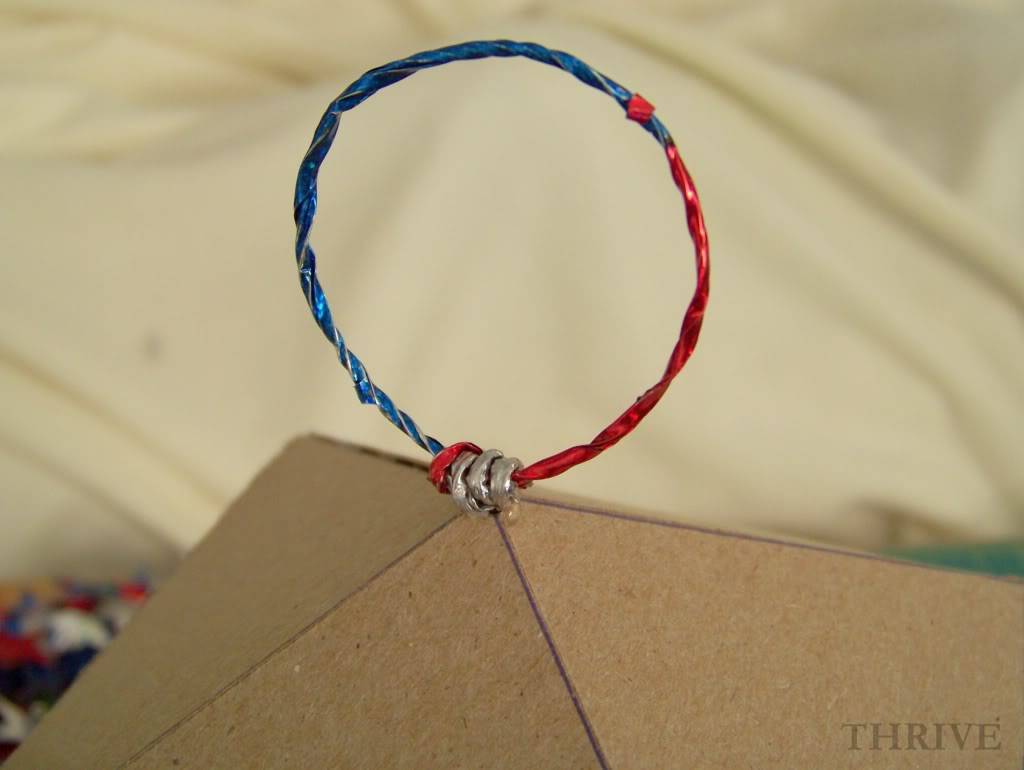
(You could also glue a small bead to the top and thread an old key ring or wire loop through.)
Spray lantern and door piece separately with a couple light coats of black spray paint and let dry.

(You’ll probably want to put something in the middle of the lantern to keep it from being blown over while it’s drying.)
To attach the door, cut two 1/2” x 3/4” pieces of scrap regular paper and glue along the left side.
Line up the door in the lantern opening and hot glue in place, making sure you leave a slight gap between the door and the side.
To make a latch to the hold the door in place, glue a small cardboard rectangle on the door, make a small hole in the side support and thread a 1” piece of wire half way through.

Spray the lantern frame one more time and let dry.
Trace “glass” pieces from white vellum and carefully glue in place.

The catalog version of the lanterns left the quatrefoil cut-outs plain, but I chose to add vellum behind them as well.
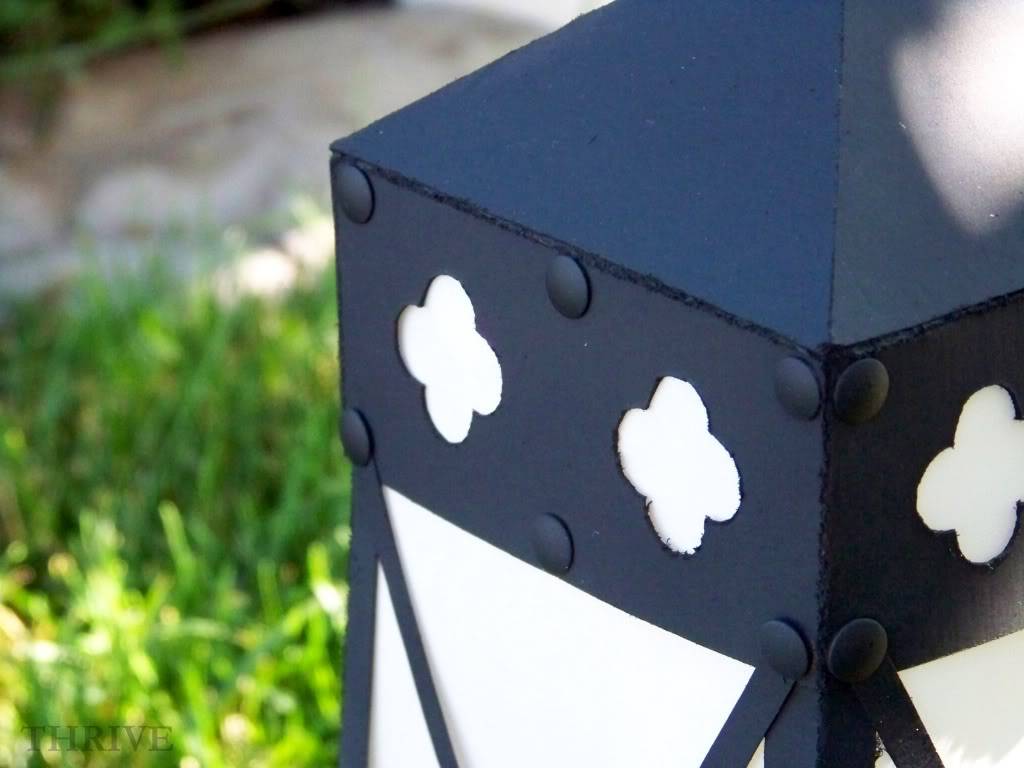
Either way works. Your choice.
To make the pillar candle, wrap a piece of yellow vellum around a narrow glass jar and drop in a battery operated tea light.
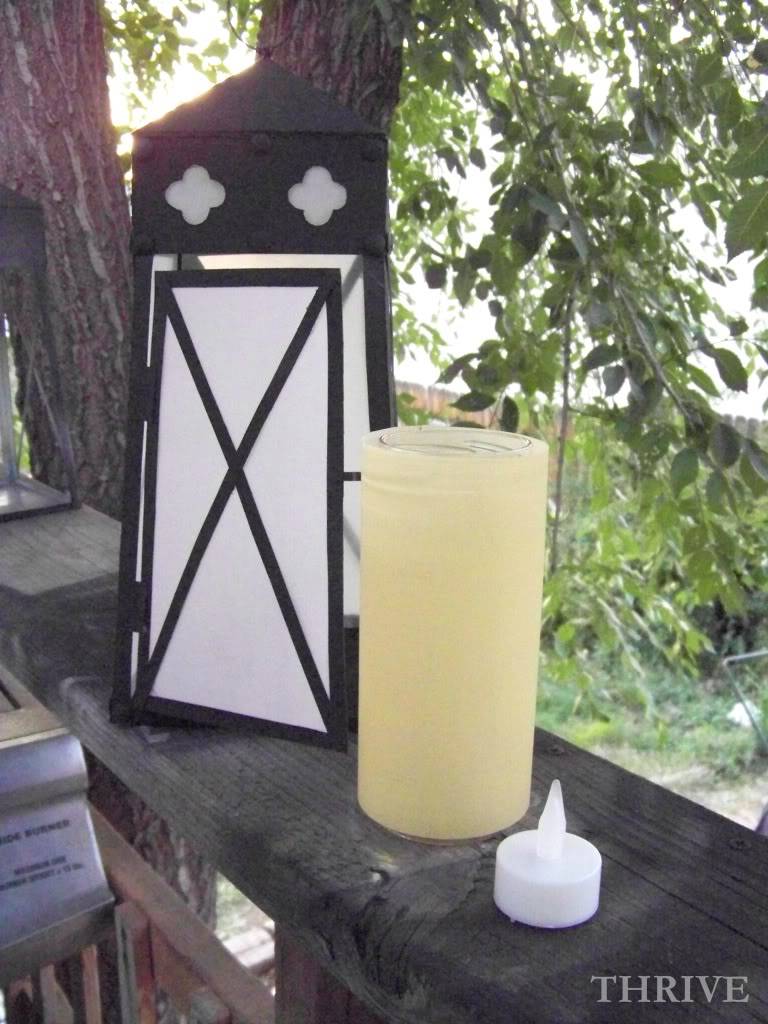
And that’s it — done and done!
Who knew you could get your very own expensive-looking-but-totally-free lantern and a full serving of whole grains out of that cereal box?
Happy crafting for free everyone!
54 Comments
YOU are incredible! WOWZER – that is amazing! 🙂
This is fantastic! I love lanterns, have a few metal ones for candles. This would be perfect to join them! Thank you!
I've seen incredible projects from you in the past, but this one takes the cake! I can't tell the difference between your and the real one! Awesome! This would be a great project for an outdoor wedding. And I am totally pinning this. Great job!
-Paulette
That is incredible! I had to actually look at all the pictures of you making it out of cardboard boxes, or I would have never believed that is what it is made out of! Awesome!
Seriously amazing. You astound me! I was just looking at this the other day online, coveted it,wondered if I could make it myself somehow, and dismissed the idea. Ha! Guess I was wrong! Thanks for the inspiration!
WOW!!!! It really looks like metal! You are some kind of wizard 🙂
Just a quick note to let you know that a link to this post will be placed on CraftCrave today [02 Aug 01:00am GMT]. Thanks, Maria
You are amazing! I can't believe how perfectly this turned out. Great job!
That is AWESOME! What a great tutorial! And a pattern too. You Rock!
That was amazing! Thanks for the great tutorial. Coming to you from Home Stories A2Z.
you are just amazing! i can't even believe how awesome this looks. you seriously knocked it out the park with this one!
They look great!! The pics didn't show up in my rss, had to click on your blog link to see them.
W O W ! This is AWESOME!!!!!!!! Fantastic Job!!
seriously, that's amazing! it looks spot on!
Nike, I am followers # 1001!! Exciting for me anyway! I love your blog, I came across it on BeDifferentActNormal, and have been ack readin on all your Genius ideas! In fact I hope you don't mind but I've just posted on my blog about your fab refashioned tees! Come check it out at athriftyfind.blogspot.com! Thanks for all of your great ideas! Em
That is AMAZING!!! It looks exactly like the "real" thing! And how you did it, so very clever!!
Wow! I just came across your blog and you are amazing! You would have done well in the "dark-ages" bringing us into the enlightenment 🙂 Thanks for sharing your talents 😉
I have been wondering how you are and what you have been up to…now I know.Hope you had a good time with your family. Really Nike way to go. You make me smile with amazement at your ingenuity. ~
You are the QUEEN! This is perfect and looks like it is the original, made of metal goodness! I will be featuring this at somedaycrafts.blogspot.com
Oh my gosh! This looks incredible!!! Amazing job.
http://www.releasemecreations.com
Thanks so much for this incredible inspiration!!! I'm all about using what is lying around my house so I totally appreciate this tute! Can't wait to make some of these, just have to remember not to leave them out in the rain 🙂
You've done it again! You are amazing!
I am so impressed! Great job on that lantern!!
Incredible! Yours looks just like the real deal!
I would never have guessed. This is so amazing!
oh. my… amazing! Newest subscriber- got your link from Knock Off Decor 😉
You are so very clever!
Absolutely brilliant! You cannot tell at all that they're made from carboard!
And what a nice clear tutorial too! Thanks for sharing!
Jill @ Creating my way to Success
http://www.jembellish.blogspot.com/
Seriously cool!!
I think I can do that!
Thank you for sharing–I'm Pinteresting it!
Blessings and joy as you make your home!
~me
Wow! That is so awesome! Thank you so much for the tutorial- I am seriously going to make it!
amazing!!!
great tutorial.
thankyou for sharing.
cheryl xox.
that is so darn impressive. TRUE TALENT. I would of never guessed in a million years it was used from cereal cardboard boxes. BRILLIANT. winks-jen
Brilliant!
This is just amazingly amazing. It looks exactly like it! You did a great job!!!!
Absolutely fantastic !!! This is just an amazing creation and you were so kind to share the tutorial ! You are so creative ~ I'm totally in love with you !!!
Naush
Love it! I featured you at my Hookin Up with HoH party this week! Congrats.
Feel free to stop by and grab a button if you'd like.
xoxo
Allison @ House of Hepworths
That is by far the coolest craft project I have ever seen! Fantastic! ~ Trina
That is by far the coolest craft project I have ever seen! Fantastic! ~ Trina
GENIOUS!!!! i totally pinned this! it is just that awesome. thanks for sharing the pattern
hey chica, i saw this today and thought of you!!
http://www.katydidandkid.com/2010/07/cereal-box-stationary-organizer.html
Simply amazing….as usual 🙂
Hi Nike I wanted to let you know I made one of your lanterns. Thanks for the tutorial and template.
http://memakingdo.blogspot.com/2011/08/trash-to-treasure.html
Wow and wow! I can not wait to make one or two or three. Thank you for sharing your talents!
Ok- you said that you make stuff out of cardboard boxes. You didn't say that you make amazing things out of cardboard boxes! Holy crap woman-you are even more amazing that I thought you were. Rock on girlie! can't wait to see what else you craft out of cardboard!
SHUT THE FRONT DOOR! Are you kidding me? I am bowled over by your creativity & ingenuity. Wow. I'm definitely going to try this. Would you consider linking it up to my party? I'd love for my readers to see it!
Warmly, Michelle
You are amazing and truly inspiring!
That turned out amazing! I can't believe that was made out of cardboard!
Genius idea! I love seeing how people create such great knock-offs!
That is so smart!!
Little fyi: an isle is an island; an aisle is where you find cereal. 😉
Enjoying your blog.
Just viewing this idea, and I'm blown away. FABULOUS!!
Well done! Really, you've done a fantastic job and that's a great tutorial too! I have this linked to my lamps & lights post as well today, nice job!
This project is absolutely AMAZING! I cannot believe you made these… and from cardboard boxes! I love quatrefoil too so I featured your project in my roundup of crafty quatrefoil projects here. Feel free to check it out and hope you like it!
-Mel the Crafty Scientist
this is super awesome! thanks for the pattern and tute!
Do you remember these awesome quatrefoil lanterns from the Ballard Designs catalog? … metalcandlelantern.blogspot.com